- 24 Hour Emergency Services
- Servicing Sydney's North Shore
- View On Map

-
Mail Us On
info@lsblocksmiths.com.au
-
Make a Call
0411 700 072
- View On Map
- 24 Hour Emergency Services
- Servicing Sydney's North Shore
- View On Map
-
Mail Us On
info@lsblocksmiths.com.au
-
Make a Call
0411 700 072
- Contact Us
Mortice Lock Installation: A Master Locksmith’s Guide

Lock, Stock & Barrel Locksmiths
On July 4, 2026
A lot of North Shore homeowners reach the same point. The old front door still looks solid, but the lockset feels light, loose, or dated, and the usual hardware-shop advice doesn't match the door that's hanging in the frame.
That's where mortice lock installation becomes worth understanding properly. On older Sydney timber doors, this isn't a simple swap. The door thickness can vary, the jambs aren't always square, and apartment owners often have strata rules sitting in the background as well. A clean result depends less on confidence and more on measuring, marking, and cutting with care before a tool ever bites into the timber.
Is a Mortice Lock Right for Your Door
If the current lock is a basic knob set and the goal is a stronger, more solid setup, a mortice lock is often the next step people look at. That makes sense. A mortice lock sits inside the door rather than hanging off the surface, so the hardware is housed within the timber itself.
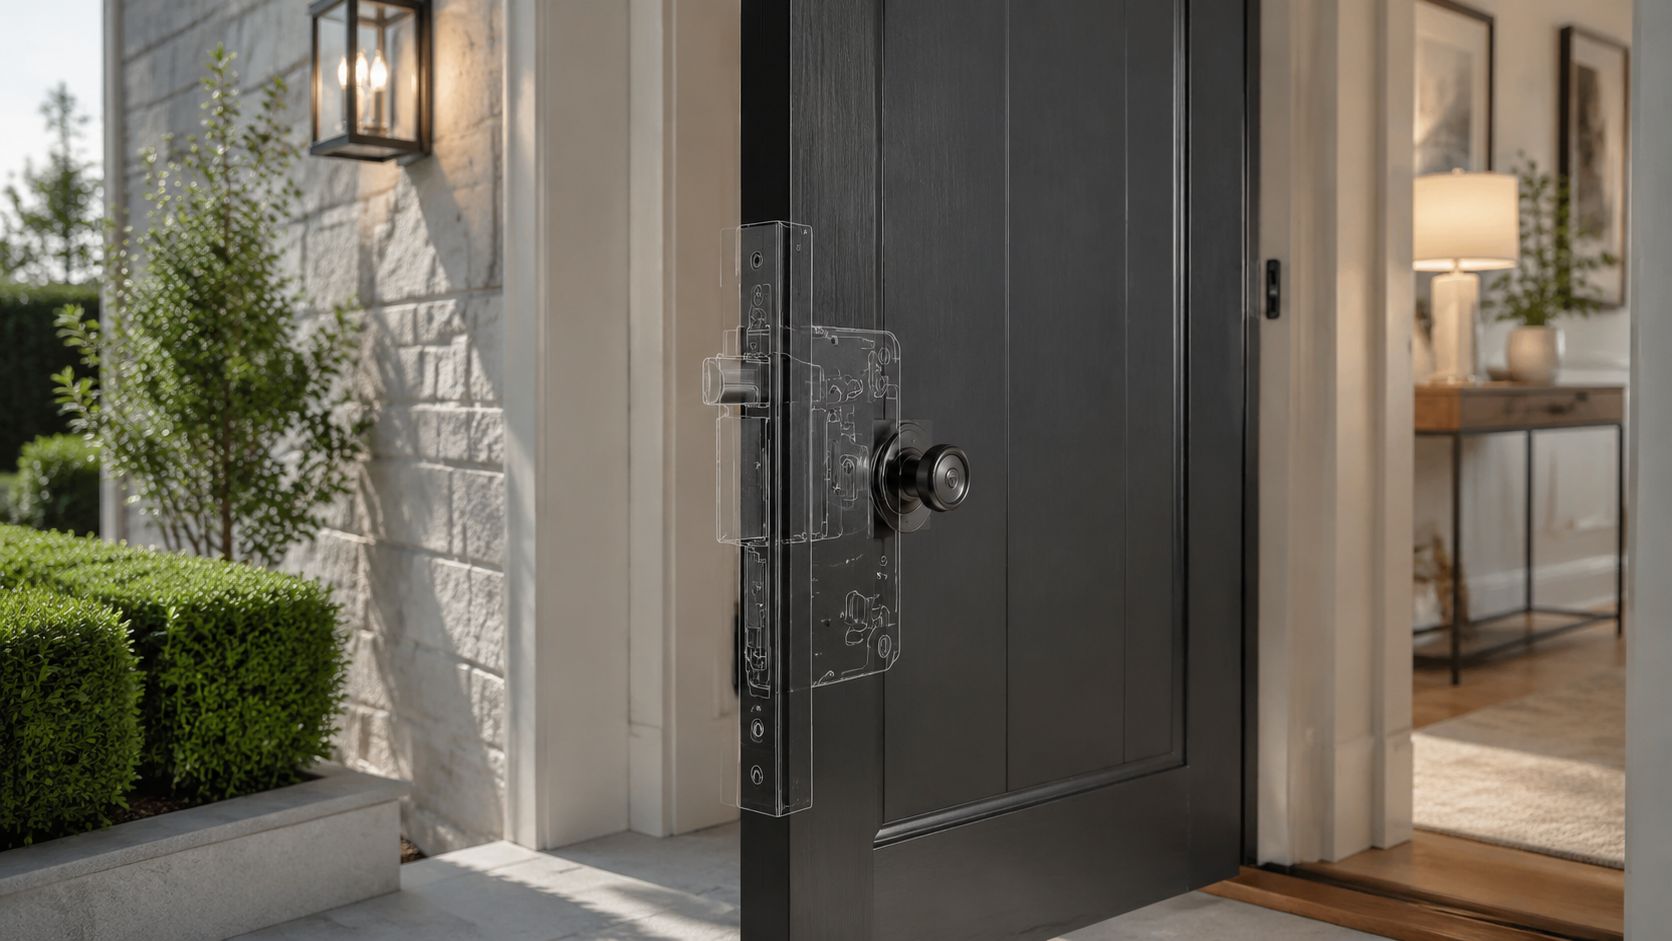
Mortice locks are engineered to be installed into a dedicated pocket, known as the mortise, which must be precisely cut into the side of the door. In Australian commercial environments, they're widely used because they suit pressed metal door frames and offer functionality that surface locks can't match, as outlined by KCS Locksmiths on mortice lock installations.
What makes a mortice lock different
A standard surface-style lock is mostly about fixing hardware onto prepared holes. A mortice lock asks more of the door itself. The installer has to create a clean internal pocket that matches the lock body, then line up the spindle, cylinder or keyhole, faceplate, and strike so they all work together.
That internal fitting is why many owners see them as a more substantial upgrade on entry doors. The lock body is buried into the edge of the door, which gives the finished job a neater look and a stronger feel in use.
For homeowners comparing options, it helps to see what the actual hardware looks like. A timber door mortice lock in satin chrome shows the general form factor clearly.
Practical rule: If the door is valuable, old, custom-made, or already a tight fit in the frame, the risk is rarely the lock. It's the cutting.
When it's a good fit and when it isn't
Mortice locks suit a lot of North Shore homes, especially where there's a solid timber entry door and the owner wants something more substantial than a light residential set. They can also be the right choice when replacing an existing mortice lock, because the prep is already there.
They're a poor choice for rushed DIY on a door that can't afford mistakes. A small error in marking can leave the faceplate crooked. A deeper error in cutting can weaken the edge of the door or leave the lock body loose in the cavity.
A good decision usually comes down to three checks:
- Door condition: Solid timber gives better scope than a thin or damaged door edge.
- Existing prep: Replacing like-for-like is easier than converting from a simple bored lock.
- Tolerance for mistakes: Once timber is removed, it can't be put back neatly.
Tools Materials and Critical Measurements
A mortice job is often won or lost before the first hole is drilled. On North Shore doors, the trouble usually starts with bad assumptions. Older timber can be out of square, thicker under old paint, thinner at the lock stile, or already patched from a previous lock that someone buried and forgot about.
That is why preparation matters more here than many US or UK guides suggest. A clean-looking front door in Mosman or Wahroonga can still have a narrow stile, hidden old cut-outs, or frame alignment issues that only show up once the lock body is offered up to the edge. In strata properties, there can also be rules around fire doors, common property hardware, and what can be altered without approval. It is better to find that out before cutting.
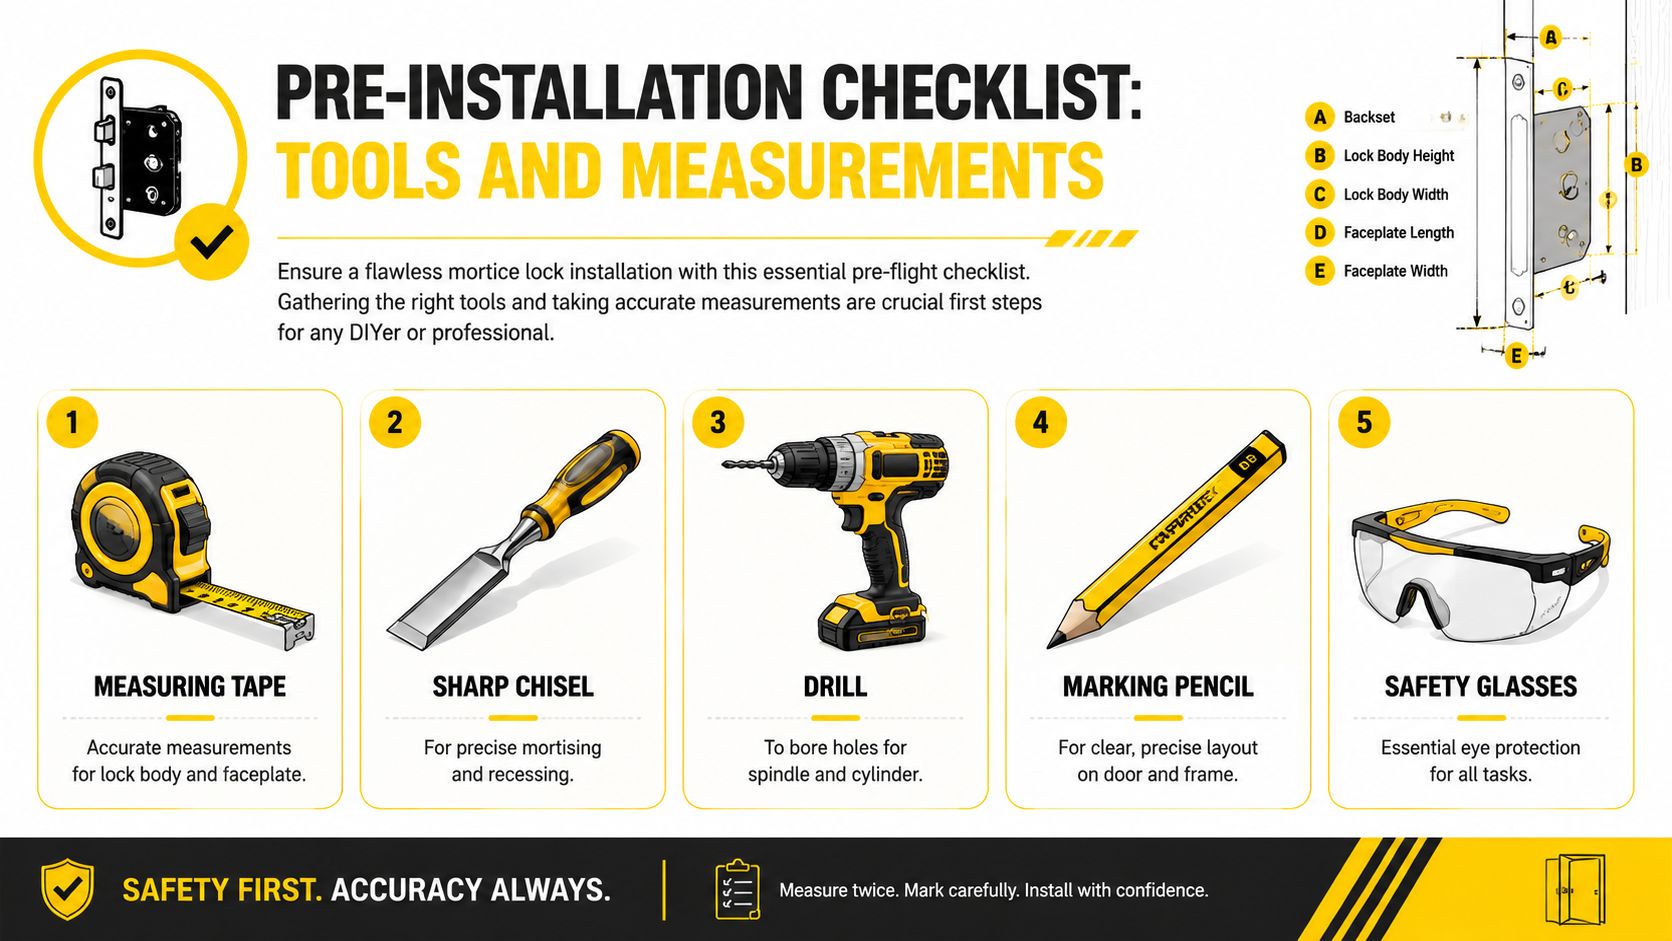
What needs to be on hand
Some gear makes the job easier. Some gear keeps the job straight.
- Sharp chisels: Blunt chisels crush fibres, wander with the grain, and leave a ragged pocket that is hard to tidy.
- Power drill with suitable bits: Used to remove most of the waste and drill the spindle and cylinder holes accurately.
- Tape measure and pencil: Clear, repeatable marks matter more than speed.
- Marking gauge or mortice jig: Helps keep the pocket centred on the door edge, which is a common point of failure on older doors.
- Safety glasses: Drilling hardwood and old painted timber throws debris fast.
- Combination square or similar straightedge: Needed to carry lines around the door and keep the hardware aligned.
Clamps, a workbench, and a depth stop are not mandatory on every job, but they reduce movement and guesswork. On a heavy solid timber door, that difference is noticeable.
The measurements that matter
Measure the lock against the actual door, not the nominal door size and not the packet.
Older North Shore doors often look consistent from the front and tell a different story on the edge. Swelling, wear, repainting, small repairs, and old hardware prep all affect what the lock can accept. A few millimetres either way can be the difference between a clean fit and a weakened edge.
Check these first:
Door thickness
Measure the door as it sits now. This affects whether the lock body will fit safely inside the edge and whether the furniture will clamp properly through both faces.Lock body size
Measure the body height, depth, and case thickness. The cavity must suit the lock body without leaving the stile too thin.Faceplate size
The recess needs to match the faceplate closely so it sits flush and straight.Backset and furniture positions
The spindle, keyhole, or cylinder position must suit the handles and escutcheons on both faces. If these are off, the trim can bind or sit crooked even if the mortice pocket looks fine.Frame and jamb clearance
Check where the latch and bolt will meet the frame. On older jambs, the strike position is not always where a standard template suggests.
Pre-measurement saves doors. It also saves expensive repairs that look obvious forever.
What usually gets missed
Two things catch DIY installers out again and again. The first is assuming the door edge is centred and uniform. The second is forgetting that the lock has to work with the frame, not just fit inside the door.
A quick check before cutting helps:
| Check | Why it matters |
|---|---|
| Door thickness | Prevents a lock body that protrudes or leaves too little timber at the edge |
| Faceplate dimensions | Stops the front plate sitting proud or skewed |
| Spindle and keyhole centres | Avoids trim misalignment, handle bind, and off-centre furniture |
| Jamb clearance | Makes sure the latch and bolt meet the strike cleanly |
| Existing hidden prep or repairs | Reveals patched cut-outs, weak timber, or old screw holes before they cause trouble |
On strata jobs, add one more check. Confirm whether the door is part of a fire-rated assembly or subject to building management approval. We have seen owners buy good hardware, mark the door carefully, and still have to stop because the alteration needed approval they did not know about. That is not a measuring problem, but it is a preparation problem all the same.
Marking Out Your Door and Frame
A lot of North Shore doors are less forgiving than they look. Old cedar and hardwood doors can be slightly out of square, and on unit jobs you may only get one clean shot before strata starts asking questions about a fire door.
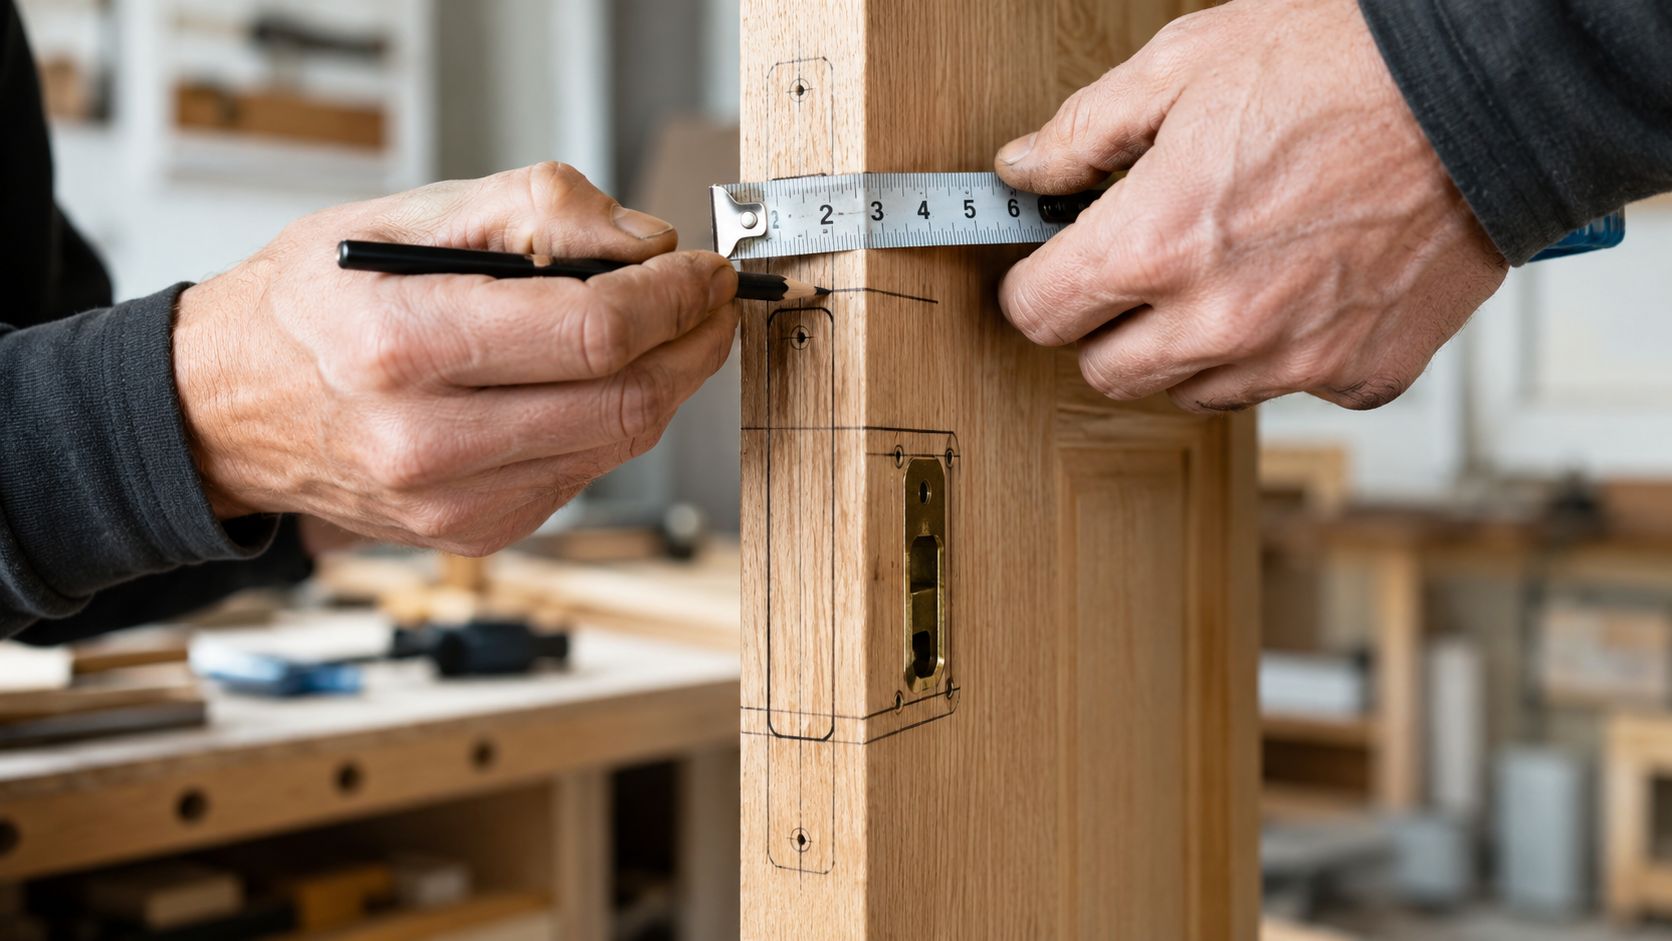
Lock height is usually set around handle height used on Australian doors, but the right position comes from the door in front of you, not a generic template. Match existing furniture where you can, check the rail position on older panel doors, and make sure the lock body will sit in solid timber rather than half in a joint or patched section.
Set the height and find the centre
Start with one clear horizontal line across the door face, then carry it onto the edge with a square. Faint marks and guessed carry lines are where neat jobs go off track.
Then mark the centre of the door edge. On older timber doors, the edge is not always evenly dressed, so do not assume the visual centre is the true centre. Measure it.
Use this order:
- Mark the chosen lock height on both faces and the edge
- Measure the door edge and strike a true centreline
- Hold the lock body to the edge and mark the top and bottom of the case
- Mark spindle and keyhole centres from the actual lock body
- Scribe the faceplate only after the body position is confirmed
That sequence prevents a common DIY problem. The cavity ends up close enough, but the handles sit slightly high or low and the keyhole trim looks crooked forever.
Use the lock body, not hope
Paper templates are fine if the hardware matches them exactly. Plenty does not. We usually mark from the actual lock because it shows its case size, its faceplate, and its spindle position.
Press the lock body against the edge and scribe it carefully. Then mark the faceplate rebate separately. Keeping those two markings distinct matters, especially on painted doors where a messy pencil line can hide a bad layout until the chisel goes in.
If the door has old screw holes, filler, or signs of an earlier latch, stop and inspect the edge before you commit. A mortice lock needs sound timber around it. On North Shore renovations, that one check saves a lot of patching.
Mark the frame from the door, not from theory
The jamb needs its own set of marks. Close the door gently and transfer the latch and bolt positions onto the frame so the strike plate lines up with how the door sits when shut.
This matters on older homes where the gap is not even from top to bottom. A textbook strike position can still be wrong if the door has dropped a few millimetres over the years or the stop has been built up with paint.
A reliable method is to mark the door first, dry-fit the lock later, then confirm the latch position against the jamb before cutting anything in the frame. It adds a few minutes. It can save an hour of repair work.
Cutting the Mortice and Fitting the Lock
This is the point where a decent layout either pays off or falls apart. On a North Shore job, especially in an older timber door, one rushed cut can leave you with a loose case, chipped paint, or a lock that never sits square again.
Remove the bulk first, then clean it up
The usual trade method is simple. Drill a row of overlapping holes inside the marked mortice, then square and straighten the pocket with a chisel. That keeps the cut controlled and saves you from trying to force a full cavity out by hand.
Trying to chisel the whole mortice from solid timber is how edges split and faceplates end up hiding ugly work.
A practical sequence looks like this:
- Drill a series of holes within the marked cavity, staying shy of the lines.
- Clear chips often so the bit tracks straight.
- Chisel down the walls in light cuts.
- Test-fit the lock body.
- Trim only the tight spots until the case slides in properly.
Sharp tools matter here. So does restraint.
Keep the cavity straight and tight
Use the chisel vertically and take small bites. If you start levering sideways, the pocket widens fast, particularly in dry old hardwood or soft pine that has already been worked on once before.
That is a common problem in renovations around the North Shore. We see doors with old latch cuts, patched edges, paint build-up, and timber that is harder on one side than the other. The lock case still needs solid material around it. If the mortice ends up too wide, the lock can shift in use and the screws start doing work the timber should be doing.
A good fit feels firm, not forced. If you have to belt the case in, the mortice is too tight. If the case drops in and rocks, you have taken too much.
Test-fit the lock before drilling through the door
Do not drill the spindle and keyhole just because the packet measurements look close. Fit the case dry first and confirm it is sitting at the correct depth and height. Then mark the actual centres from the lock body.
That one step avoids a lot of grief.
On some older Sydney doors, the stile is not perfectly even, and on painted doors the edge can hide previous repairs. If you drill too early, the handle and escutcheon can finish out of line even though the mortice itself is acceptable.
For cleaner holes and less breakout:
- Mark from the fitted case, not from a template alone
- Drill from both faces where possible
- Check the spindle passes freely before fitting furniture
- Leave a little margin for final trimming, not guesswork
If the door is part of a strata property, slow down before you commit to through-holes. Some buildings are strict about fire-rated doors and hardware changes. Cutting first and asking later is a bad order.
Cut the faceplate rebate last
Once the body sits home properly, scribe the faceplate and cut the rebate to suit. The rebate only needs to be deep enough for the plate to finish flush with the door edge.
Too shallow and the plate stands proud, which can affect how the door meets the frame. Too deep and the plate looks sunken, with less support at the edge where the screws need decent timber.
Take light passes with a sharp chisel and check the fit often. This part is slow on purpose. Clean, boring work usually gives the best result.
Installing the Strike Plate and Testing
A mortice lock can be fitted beautifully into the door and still work poorly if the strike is off. The frame decides whether the latch enters cleanly, whether the bolt throws fully, and whether the door closes without a shove.
Get the strike location from the fitted lock
The cleanest method is to use the installed lock as the reference. Close the door gently and transfer the latch and bolt positions onto the jamb. Those marks are more reliable than trying to estimate from raw measurements alone.
Then offer up the strike plate and trace around it. Just as with the faceplate on the door edge, the strike wants a neat rebate so it finishes flush with the jamb.
A practical sequence is:
- Mark the latch and bolt centres with the lock already fitted.
- Position the strike plate against those marks.
- Scribe the plate outline before cutting anything.
- Cut the rebate and recesses gradually until the plate sits flat and the latch enters cleanly.
What smooth operation should feel like
A finished lock should work without force. The latch should click into the strike without scraping. The key should turn without a graunching feel. The handle should return cleanly.
Testing should be systematic, not casual.
| Test point | What to check |
|---|---|
| Latch entry | Latch enters the strike without catching |
| Key action | Key turns smoothly through the full action |
| Handle return | Lever or knob returns without slack or sticking |
| Door close | Door shuts flush in the frame without pressure |
| Bolt throw | Deadlocking action extends and retracts freely |
If the door has to be lifted, pushed hard, or pulled back slightly to lock, the job isn't finished yet.
Test with the door open and closed
Both positions matter. A lock can feel perfect with the door open and fail the moment the latch meets the strike.
Run the handle, key, and bolt several times with the door open first. Then repeat the same checks with the door shut. That's the easiest way to spot whether the issue sits in the lock body itself or in the relationship between the door and the frame.
Common Problems and Quick Fixes
Most call-backs on mortice lock work come down to alignment, not defective hardware. The signs are usually obvious once the symptoms are separated from the cause.
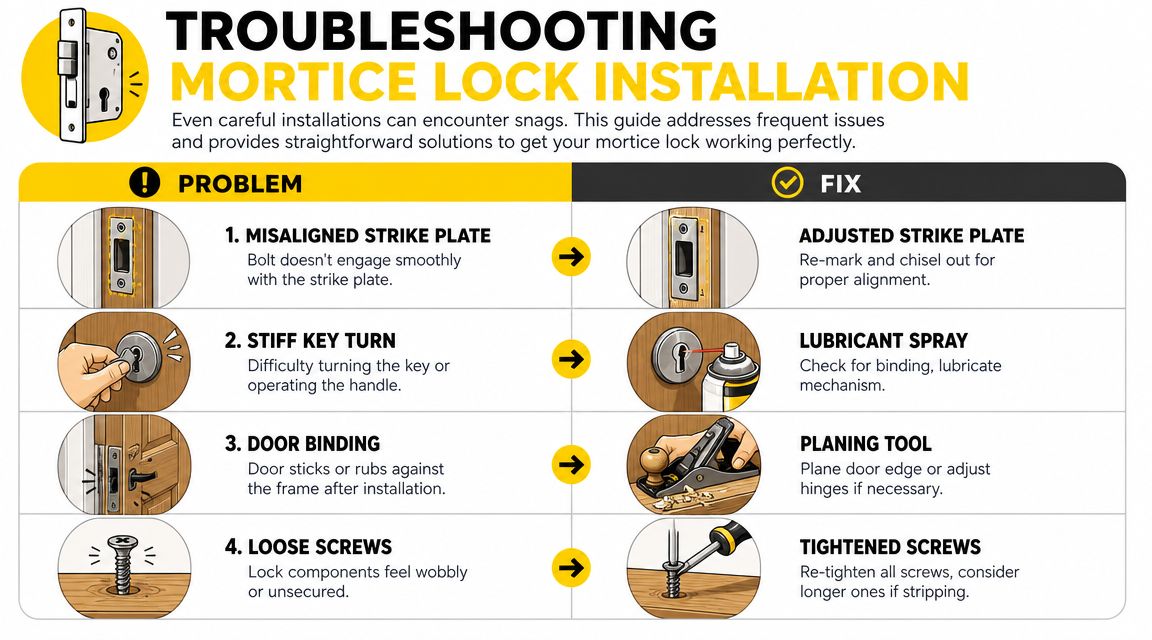
Common pitfalls include drilling the spindle hole off-centre, which can cause the spindle to bind or slide unevenly, and failing to chisel the faceplate rebate to the correct depth, which can leave the striker plate sitting proud of the frame edge, as shown in this mortice lock installation troubleshooting reference on YouTube.
Problem one with a stiff handle or key
Symptom
The handle feels tight, slow to spring back, or the key doesn't turn cleanly.
Likely cause
The spindle hole may be off-centre or slightly too tight, causing the spindle to drag through the lock body. The trim may also be pulling the furniture out of line when tightened.
The fix
Remove the furniture and test the lock body alone. If the action improves, the issue is usually alignment through the door faces rather than the lock itself. Recheck the spindle path and correct the hole so the spindle passes straight.
For ongoing reliability after installation, it also helps to follow a sensible door lock maintenance routine.
Problem two with a latch that catches on the frame
Symptom
The latch scrapes, clicks weakly, or needs the door pushed to engage.
Likely cause
The strike plate position is slightly off, or the rebate depth is wrong and the plate is sitting proud. That changes how the latch meets the opening.
The fix
Back the strike off, remark it from the actual latch position, and deepen or correct the rebate as needed. Small corrections often solve this. Large screw-driver persuasion usually doesn't.
Problem three with loose or rattly hardware
Sometimes the door closes and locks, but everything feels a bit loose. The body may have too much room in the cavity, or the faceplate and furniture screws may be taking strain they shouldn't be taking.
A quick triage table helps:
| Symptom | Likely cause | Fix |
|---|---|---|
| Lock body movement | Mortice pocket cut too wide | Pack and refit carefully, or repair the cavity before refastening |
| Faceplate not flush | Rebate too shallow or uneven | Re-chisel lightly until the plate sits level |
| Furniture wobble | Through-fixings not aligned or tightened evenly | Re-seat trim and tighten in sequence |
Small alignment errors spread through the whole lockset. A millimetre at the spindle can become a constant sticking point at the handle.
When to Call a Locksmith and Local Considerations
You get the lock marked out, start cutting, and then the old North Shore door tells the truth. The stile is thinner than expected, the timber is harder on one side than the other, and there is an old prep hidden under paint from a lock fitted twenty years ago. That is usually the point where a straightforward DIY job turns into a door repair.
Mortice locks suit plenty of doors, but some jobs deserve a harder look before any chisel comes out. Custom timber entry doors, older hardwood leaves, fire-rated apartment doors, and doors in strata buildings all carry more risk. If the pocket is cut off-centre or too deep, there is no neat way to hide it. On a painted rental door you might get away with filler. On a stained cedar front door in Mosman or Gordon, you usually will not.
In NSW, professional mortice lock installation commonly sits above the price of a basic cylindrical lock fit because the work is slower and less forgiving, as outlined in The QuoTe Yard's NSW lock installation pricing guide. That extra labour is not just about cutting a hole. It is about measuring the door properly first, checking backset and stile width, confirming clearances at the frame, and making sure the lock you bought suits the door in front of you.
That pre-check matters more on the North Shore than many online guides admit.
A lot of US and UK tutorials assume square, consistent timber and plenty of meat in the door edge. Older Sydney homes often give you neither. We regularly see painted-over mortices, patched strike areas, rebated frames that have shifted a few millimetres over time, and doors that were never hanging perfectly straight to begin with. If you install the lock to the brochure dimensions without checking the actual door and frame, the latch can bind, the key can feel rough, or the lock body can weaken the stile.
Strata adds another layer. Apartment entry doors and common property doors may need approval before hardware is changed, and fire-rated doors should not be cut or modified casually. NSW also takes building safety hardware seriously. Residential strata schemes must fit window safety devices that restrict opening to less than 12.5 cm (125 mm) under the NSW rules on window and balcony safety. Under the same compliance area, owners corporations can face fines of up to $550 for some breaches, as explained in the PICA Group summary of strata window lock obligations. Door hardware is a different category, but the lesson is the same. Check the rules before you cut.
Call a locksmith if the door is expensive, heritage-style, fire-rated, badly out of square, or part of a strata property where approval may apply. It also makes sense if you are not fully sure about measurements before buying the lock. A good lock installation and repair service will usually spot the problems that cause most failed DIY installs before the first cut is made.